Pages

Saturday, January 18, 2014

Como Hacer un Monstruo con un Plato de Papel

Hola a todos!!!
Hoy vamos a hacer una actividad que les va a gustar mucho a los pequeñines del hogar!!!
Vamos a elaborar un monstruo con un plato de papel.

Con esta actividad nuestros hijos van a desarrollar su habilidad para recortar y para pintar con pincel.


  • Para esta actividad vamos a necesitar lo siguiente:
Materiales:
  • Plato de papel desechable
  • 6 tiritas de chenille color naranja
  • Pintura acrilica azul
  • Papel bond blanco 
  • Tijeras
  • Lapiz
  • Pincel
  • Marcador indeleble
  • Goma EVA (foamy) morado, blanco y negro
  • Pistola de silicon caliente
Procedimiento:

  • Primero vamos a cortar el plato de papel a la mitad.
  • Despues vamos a sacar los moldes en el papel blanco de los cuernos y ojos de nuestro monstruo.


  • Vamos a pintar nuestro plato con la pintura acrilica azul. (otra opcion es usar un plato de color azul)


  • Vamos a trazar y recortar en la goma EVA los ojos (como es un monstruo vamos a necesitar 3) y los cuernos.
  • Tambien vamos a enroscar los chenilles naranjas con la ayuda de un lapiz. Estos van a ser el cabello de nuestro "amiguito".


  • Ya que tengamos todas las piezas listas, vamos a comenzar a pegarlas con el silicon caliente.
  • Primero pegamos el cabello y los cuernitos.


  • Luego pegamos los ojitos, lo decoramos con una linda sonrisa y le agregamos unos lindos dientitos. 
  • Decoramos los cuernos con el marcador indeleble (como se muestra en la fotografia).  


Y listo!!! Tenemos terminado un lindo monstruo azul!!!

Aqui les comparto el monstruo de mi hija, (al cual le puso el nombre de MOSI). Espero les guste.


Gracias por leer mi blog y hasta la proxima!!!


How to Make Valentine's Cards

Hello everyone!

Soon it will be February and therefore Valentine's Day.
And a good option is to give away little cards as a sign of our love for others.
This time we will make our own cards in which can participate our little ones.


For this activity we will need the following:

Materials:

  • Construction paper (red & pink)
  • White paper (bond)
  • Stickers (or any embellishment we have at home)
  • Hot glue gun
  • Pencil
  • Ruler
  • Glue or glue stick
  • Scissors

How to do it:

  • First thing we need to do is print any image we like on bond paper. (I printed the phrase "Happy Valentine's Day", but can be whatever you like it more).

  • We will draw and cut a rectangle on the construction paper (pink or red)  with a card measures. (I cut different sizes of cards. 4 x 6, 3 x 5, & 3 x 3).But this depends on the size you want your cards to be. 
  • You're going to cut the phrases you printed on the bond paper, (as shown in the picture).

  • Now we will fold in half the construction paper to make our Valentine's card.
  • Then, we'll glue the white paper (with the printed phrase) on our card.

  • Then we'll start decorating our card with stickers or any paper embellishment that we find at home. I used a paper trim that I had bought last year at the dollar store.

  •  For the stickers to have a 3D effect, you can put a little piece of foamy before you attach the sticker to the card.

  • And presto! When you finish adding all the details you want, you'll have a beautiful Valentine's card!
  • Here I leave other cards that my little daughter and I made, to her classmates and the teacher. 
  • And remember!!! The imagination is endless; you just have to dare to create a new project!!!


Happy Valentine's Day in company of your loved ones!
Kisses and more kisses from Julieta!!!

Thanks for visiting my blog and until next time!


Wednesday, January 15, 2014

Cartoncito para bolsa de dulces para San Valentin

Hola a todos!!!
Hoy vamos a decorar las bolsitas de dulces que se acostumbra dar en la escuela u oficina el dia del Amor y la Amistad (San Valentin).


Para estos cartoncitos (bag toppers) vamos a necesitar lo siguiente.

Materiales:

  • Pegamento en barra
  • Tijeras
  • Cartulina rosa o roja
  • Lapiz
  • Pistola de silicon caliente
  • Calcomanias o cualquier detalle para decorar
  • Bolsitas de plastico
  • Chocolates o cualquier dulce para rellenar las bolsitas
  • Letrero impreso con la frase deseada (ejemplo: "Thanks for be my friend")
Procedimiento:

  • Primero vamos a trazar y recortar un rectangulo en la cartulina rosa (que tenga el mismo ancho que la bolsita de plastico, y el doble de la altura que deseamos darle al cartoncito)
  • Doblamos la cartulina a la mitad.
  • Tambien vamos a imprimir la frase que escogimos para darle gracias a la persona a la que le vamos a dar la bolsita.

  • Grapamos el cartoncito (bag topper) sobre la bolsita de plastico ya llena de dulces.
  • Ahora vamos a pegar el papel blanco que tiene impresa la frase (como muestra la foto).

  • Por ultimo vamos a decorar el cartoncito con las calcomanias o detallitos que sean mas de nuestro agrado.
  • Si deseas lograr un efecto de 3D pega antes de cada calcomania un pedacito de foamy para resaltar cada detalle.
Y listo!!!, tenemos un hermoso y dulce detalle para endulzarle el dia a culquier amigo o compañero de trabajo o escuela.

Nota: Si acaso no tienes a la mano una impresora no importa!!! Puedes decorar estas bolsitas solo con las calcomanias y al reverso poner tu nombre y a quien va dirigida. (como muestro en la fotografia).


Les mando dulces besos!!!
Gracias por visitar mi blog y hasta la proxima!!!


Tuesday, January 14, 2014

Como hacer tarjetas para San Valentin facil y rapido

Hola a todos!!!

Pronto va a llegar el mes de Febrero y con el el dia del amor y la amistad o dia de San Valentin.
Y es costumbre regalar tarjetitas como muestra de nuestro cariño hacia los demas.
En esta ocasion vamos a elaborar nuestras propias tarjetas en la cual pueden participar nuestros pequeñines.


Para esta actividad vamos a necesitar lo siguiente:

Materiales:

  • Cartulina (rojo, rosa)
  • Papel bond
  • Calcomanias (o cualquier adorno que tengamos en casa)
  • Pistola de silicon caliente
  • Lapiz 
  • Regla
  • Pegamento (de barrita o liquido)
  • Tijeras

Procedimiento:

  • Lo primero que vamos a hacer es imprimir cualquier imagen que nos guste en el papel bond. (yo imprimi la frase "Happy Valentine's Day", pero puede ser lo que a ti te guste mas).

  • Vamos a trazar y recortar un rectangulo en el papel rosa o rojo de la medida que desees. Yo recorte dos rectangulos medianos y dos mas pequeños, esto depende del tamaño que desees que sean tus tarjetas.
  • Ademas vas a recortar las frases que imprimistes en el papel bond blanco, (como muestra la foto).

  • Ahora vamos a doblar a la mitad la cartulina rosa para formar nuestra tarjeta.
  • Despues vamos a pegar el papel blanco sobre nuestra tarjeta.

  • Despues vamos a empezar a decorar nuestra tarjeta con detallitos que hayamos encontrado en nuestro hogar. Yo utilice unos ribetes de papel que habia comprado el año pasado y compre unas calcomanias en una tienda del "dolar".

  • Para que las calcomanias tengan un efecto de 3D puedes poner un pedacito de foamy antes de pegar la calcomania a la tarjeta.

  • Y listo!!! Cuando termines de agregar todos los detallitos que desees tendras unas hermosas tarjetas de San Valentin!!!


  • Aqui les dejo otras de las tarjetas que hicimos mi pequeña hija y yo para los compañeros de la escuela y para la maestra. Y recuerden la imaginacion es infinita, solo hay que atreverse a crear un proyecto nuevo!!!


Les deseeo feliz dia de San Valentin en compañia de sus seres amados!!!
Besos y mas besos!!! de parte de Julieta!!!

Gracias por visitar mi blog y hasta la proxima!!!


Monday, January 13, 2014

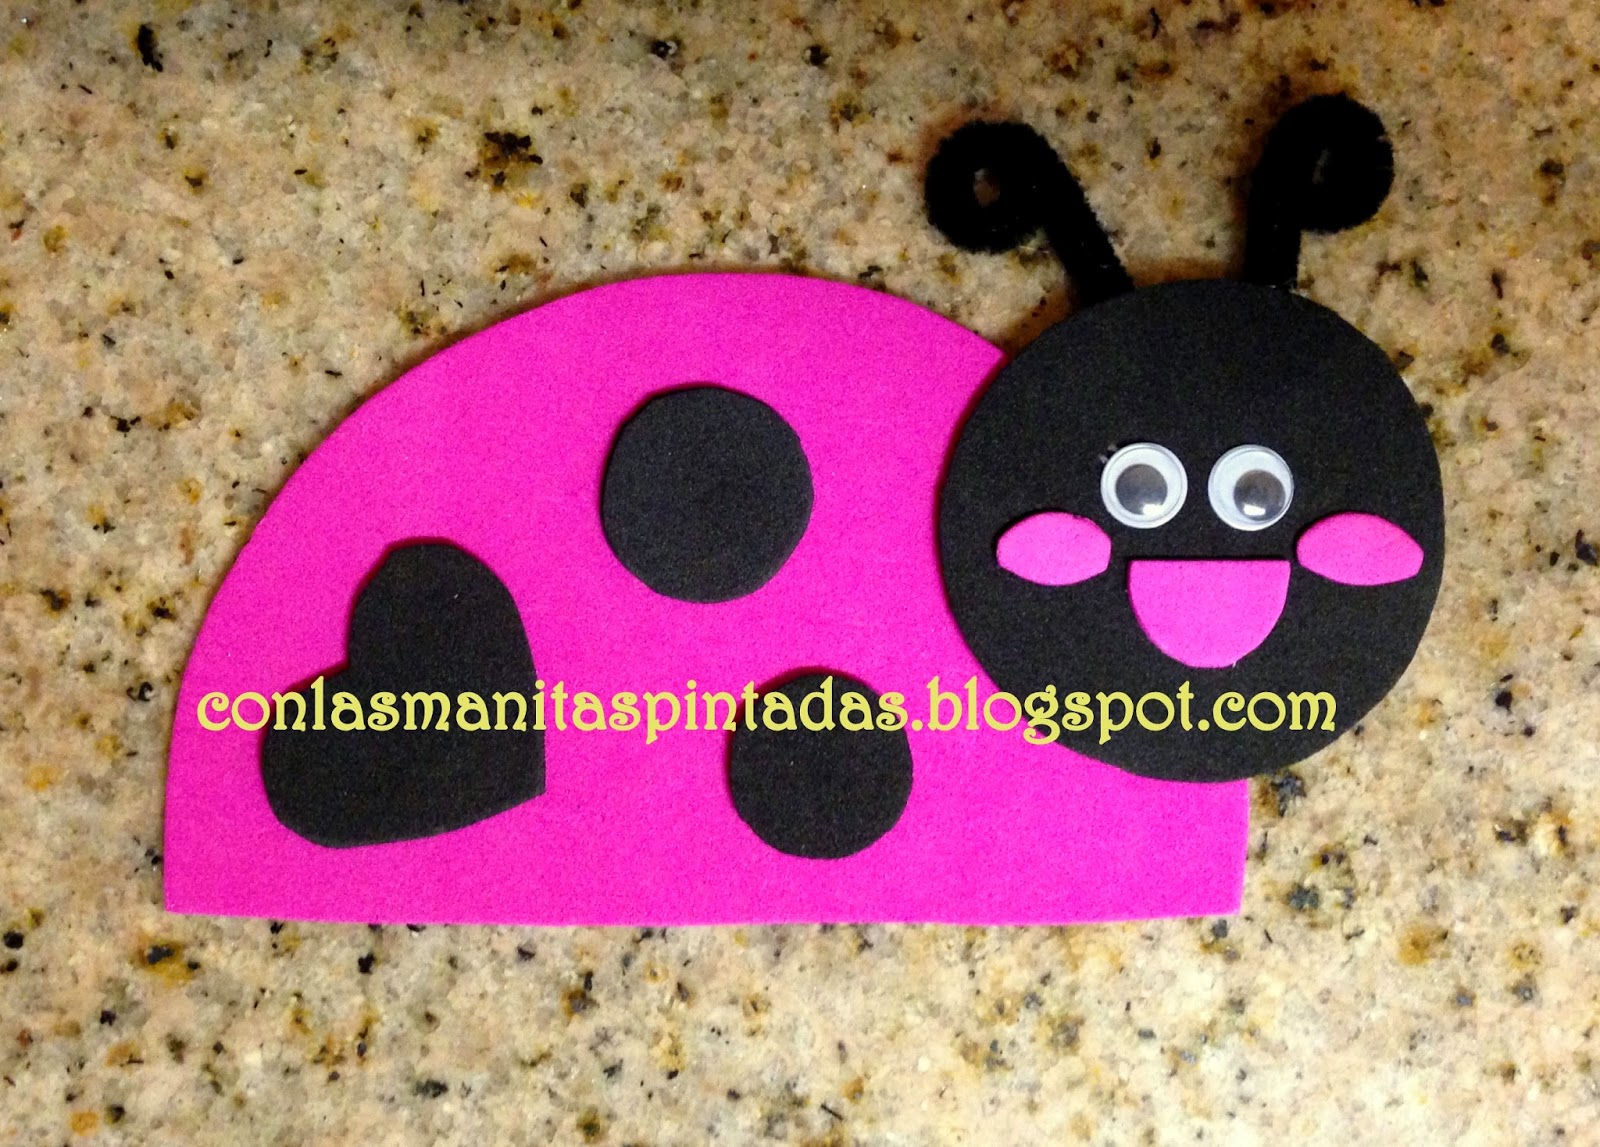
Lady Bug Valentine's Card

Hi my little friends!!!!

Today we will make a cute little card for Valentine's Day!!!


Materials:

  • EVA foam (pink and black)
  • Scissors
  • 2 google eyes
  • Permanent marker (black)
  • White bond paper
  • Hot glue gun
  • 1 chenille stick (black) 
How to do it:
  • We will trace and cut all the pieces of the ladybug on the white bond paper (this way we will get our templates). To get the body of our ladybug trace the contour of a bowl of cereal (cut in half), and the head with a glass and the little details with a few coins.
  • When we have all our templates,we will trace and cut in the corresponding foam color.

  • After that, we're ready to put all the pieces together of our ladybug. Gluing all parts with hot glue.
  • Then we added some nice chenille antennas, some black spots and a smile with the pink foam, and we can't forget the googly eyes!!!

  • Just we need to add the text "Happy Valentine's Day"
  • You can add the text you want, either the name of the person to whom you'll give this little detail, etc..


  • And presto, we finished our Ladybug Valentine's Card!!!   


Thanks for visiting my blog and until next time!!!


How to make a LadyBug with a paper plate

Hi, everyone!!!

As soon will be San Valentine's Day, and the main color of this celebration is red, we will craft an animal that has this color: a beautiful ladybug.


For this project we will need the following.

Materials:

  • Paper plate
  • 2 pom poms (black)
  • EVA foam (black)
  • Acrylic paint (red and white)
  • Scissors
  • Pencil
  • Bond paper (white)
  • Fine-tipped paintbrush 
  • Hot glue gun

How to do it:
  • We will trace and cut on white paper, the head and the details of the ladybug. (this way we will get our templates). For the head I used a glass and for the little circles of its body I used a coin.

  • Now let's trace and cut out templates on EVA foam.
  • And remember!!! Don't forget to cut the 2 antennas of our ladybug.

  • We'll also need to paint the paper plate with the red acrylic paint and wait for it to dry.


  • When the paper plate has dried, we are ready to start shaping the ladybug.
  • Now, we can glue all the pieces together with the hot glue, as shown in the picture.
  • Remember to glue the 2 pompoms in the antennas of our "little friend"!

    • And presto! We have a beautiful ladybug!
    If you want to add more detail to the ladybug, you can use white acrylic paint and a fine-tipped paintbrush and paint some white stitches around the black foam as I did.


    Thanks for visiting my blog and until next time!!!


    How to make a lion with EVA foam - foamy -

    Hi, everyone!!!


    This time we will make a craft where we will include the king of the jungle: the lion.
    Of course our lion will not cause us fear but rather provoke us tenderness.


    For this activity we will require the following:

    Materials:
    • EVA foam (yellow, black, and orange)
    • Scissors
    • Hot glue gun
    • Pencil
    • Permanent marker (black, yellow and brown)
    • Bond paper (white)
    • Acrylic paint (white)
    • Fine-tipped paintbrush


    • Let's first draw and cut the lion of our choice in the bond paper, so we will get our templates.


    • Next, we will draw and cut out templates in EVA foam, (the lion's body and face  in yellow, and tail and mane in orange) 


    • When we have all the pieces cut out, we will add more detail going around the edge of them with permanent marker and fading with a finger or a cotton swab.


    • When we have finished outlining all parts of our lion, we will put all the pieces together with hot glue.
    • Now, let's glue the ball of the tail, the eyes and we will paint a beautiful smile, plus add some nice freckles.


    • Finally we will give some details adding light with white acrylic paint.


    • And presto!! We have the king of the jungle finished decorating some corner of our home.


    Thanks for reading my blog and until next time!!!